1600 Lumen Trionic LED Front Light with Battery Pack

This manual both shows how you attach the light holder and the light on a Walker (left column below) and also how you attach them on a Veloped (right column below).

In the left-hand photo, A shows the holder attachment parts for a Walker (2 screws + 2 washers). B shows the holder attachment parts for a Veloped (1 screw + 1 knurled nut + 1 nut).

1600 Lumen Trionic LED Front Light with Battery Pack

Attaching the Light Holder

Instructions for a Walker
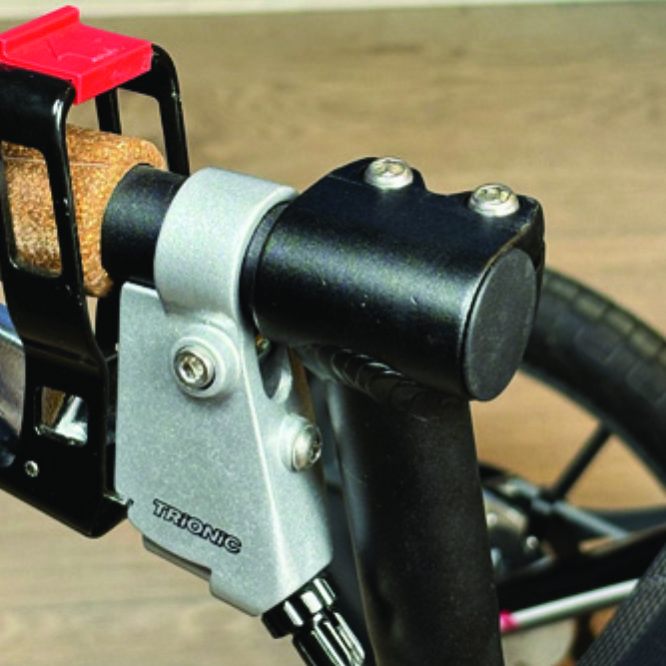
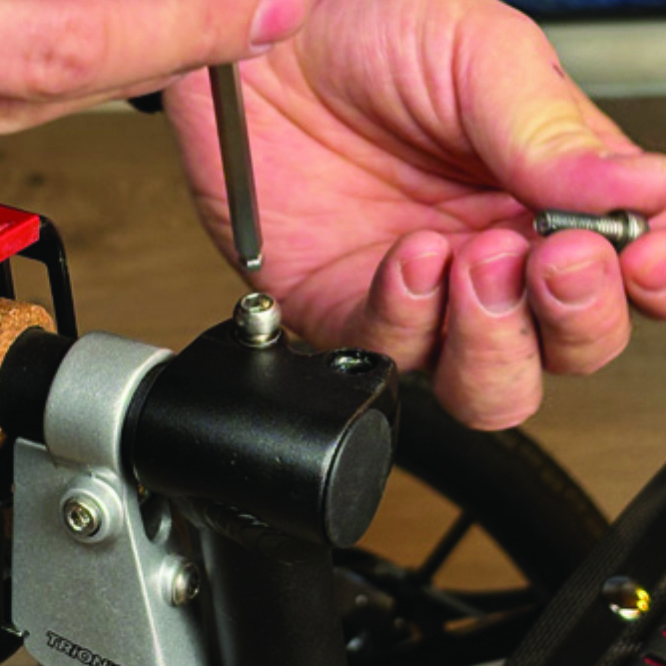
On top of the black semi-vertical tube, locate the two screws that clamp the grip tube, situated in front of the brake lever.
A1. On top of the black semi-vertical tube, locate the two screws that clamp the grip tube, situated in front of the brake lever.
Loosen both screws with the 5mm allen key included with the LED light.
A2. Loosen both screws with the 5mm allen key included with the LED light.
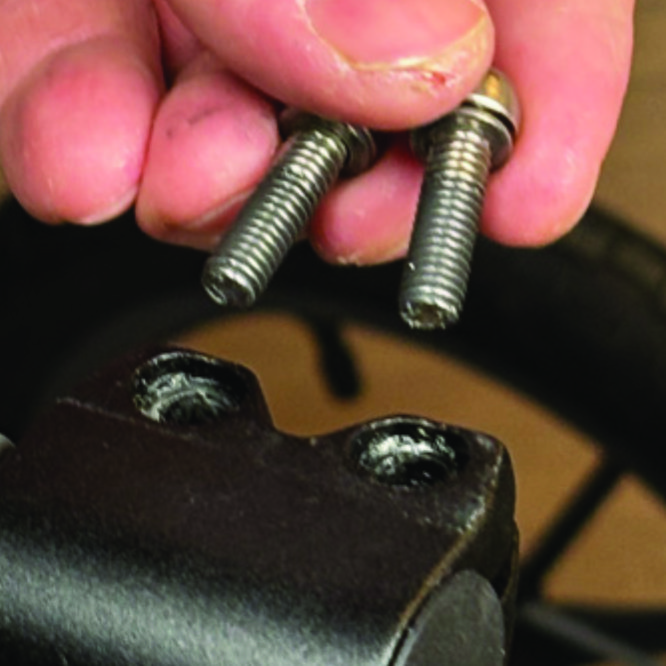
Remove the two screws from the grip clamp.
A3. Remove the two screws from the grip clamp.
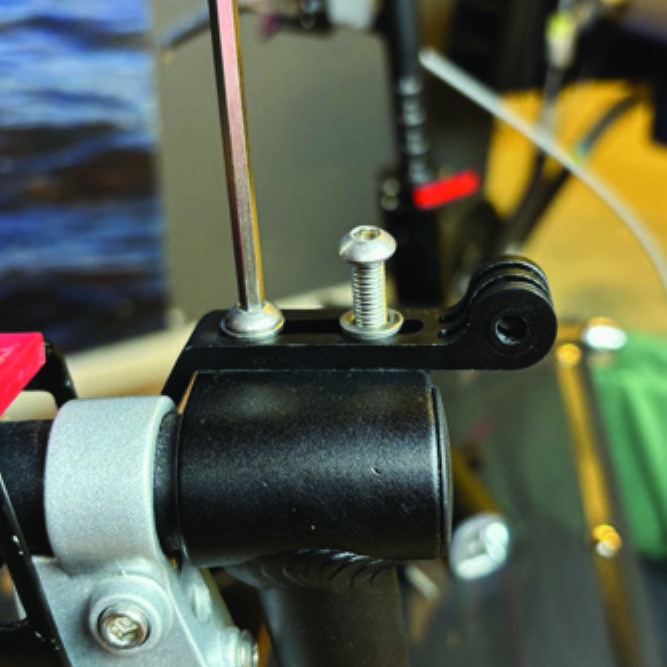
Place the light holder on top of the grip clamp, with its circular and slotted light attachment pointing forwards and upwards. Enter the two screws with washers into the holes of the clamp.
A4. Place the light holder on top of the grip clamp, with its circular and slotted light attachment pointing forwards and upwards. Enter the two screws with washers into the holes of the clamp.
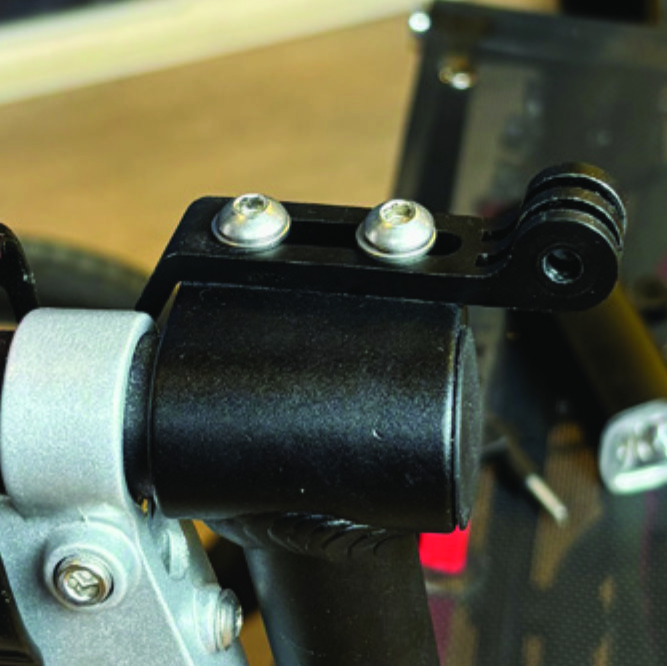
Tighten the two screws with the 5mm allen key. NOTE: It is important that you tighten the screws properly as they secure the grip tube with its rubber grip and brake lever.
A5. Tighten the two screws with the 5mm allen key. NOTE: It is important that you tighten the screws properly as they secure the grip tube with its rubber grip and brake lever.

Instructions for a Veloped

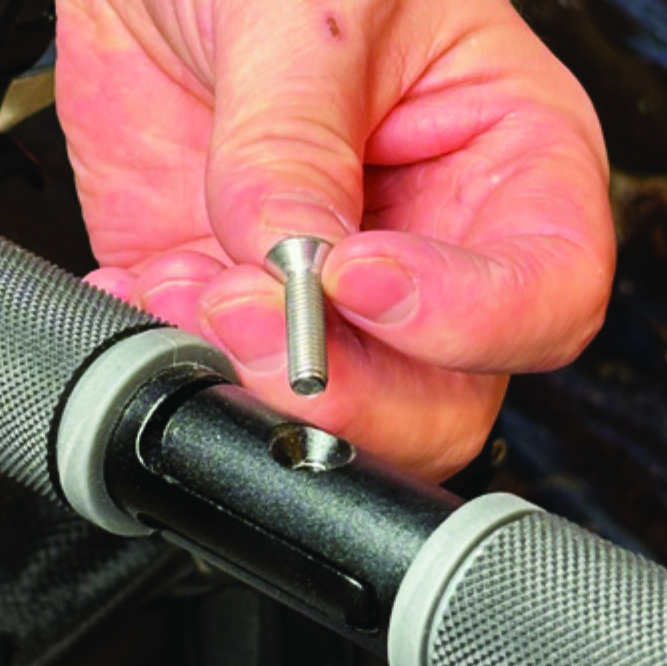
Locate the screw at the center folding hinge of the U-shaped grip bar of the Veloped. Unscrew the screw with the included 4mm allen key and remove it.
A1. Locate the screw at the center folding hinge of the U-shaped grip bar of the Veloped. Unscrew the screw with the included 4mm allen key and remove it.
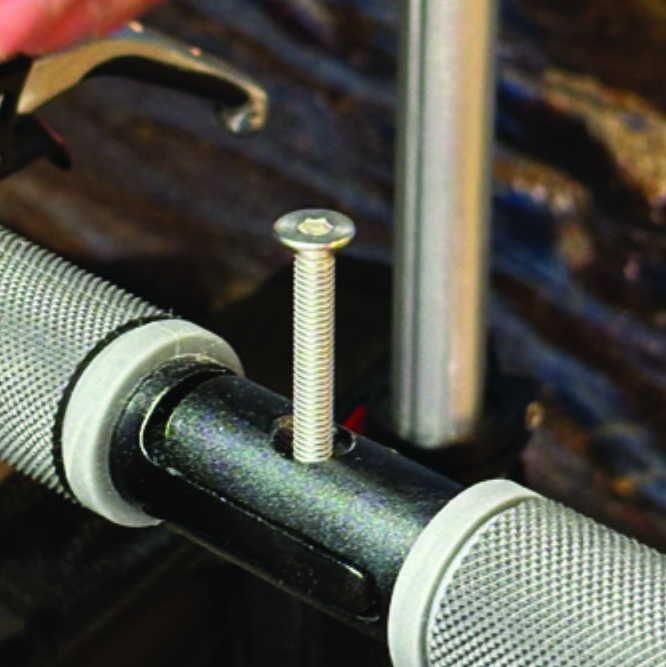
Replace the old screw with the longer screw included with the LED light. Attach the longer screw to the hinge and tighten it with the 4mm allen key.
B2. Replace the old screw with the longer screw included with the LED light. Attach the longer screw to the hinge and tighten it with the 4mm allen key.
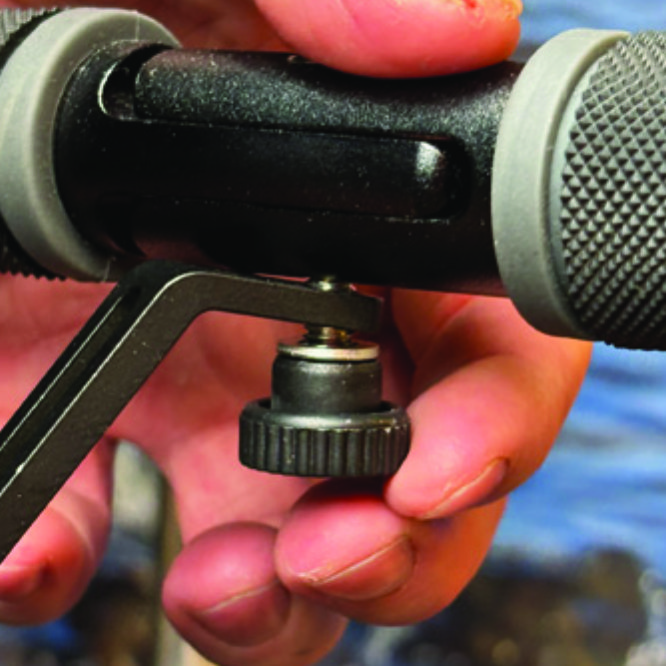
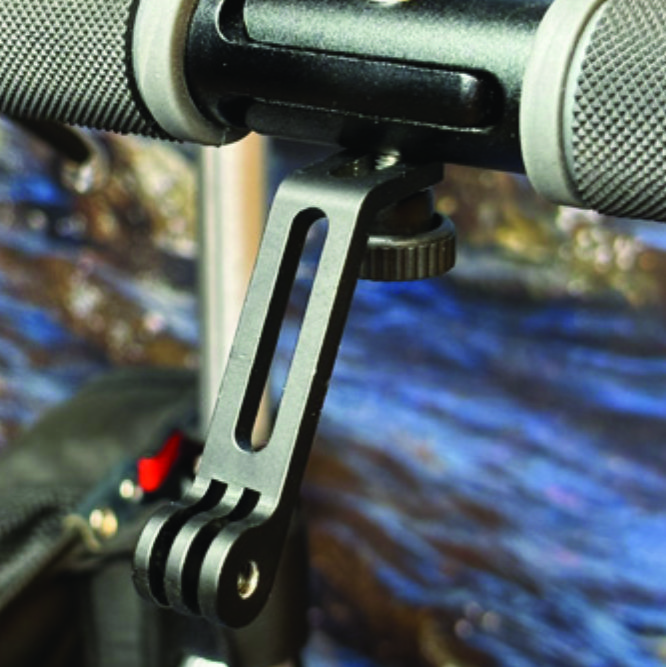
Attach the short angled end of the light holder to the lower end of the screw, on the downside of the grip bar. Fasten the holder with one washer and the knurled nut.
B3. Attach the short angled end of the light holder to the lower end of the screw, on the downside of the grip bar. Fasten the holder with one washer and the knurled nut.
For a more secure holder attachment, avoiding the holder to unintentionally turn sideways, replace the knurled nut with the included stainless steel nut and tighten it with a 10mm spanner.
B4. For a more secure holder attachment, avoiding the holder to unintentionally turn sideways, replace the knurled nut with the included stainless steel nut and tighten it with a 10mm spanner.
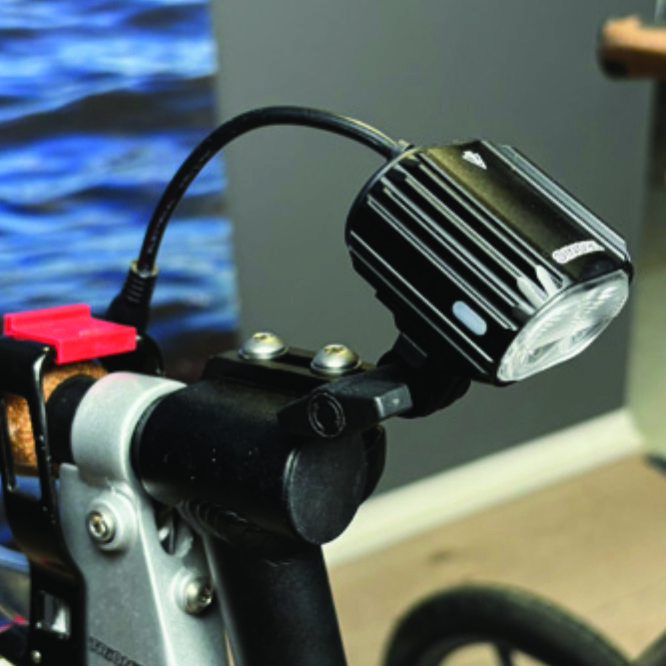
This photo shows the light holder as correctly attached.
B5. This photo shows the light holder as correctly attached.

Attaching the LED Light to the Holder

Instructions for a Walker
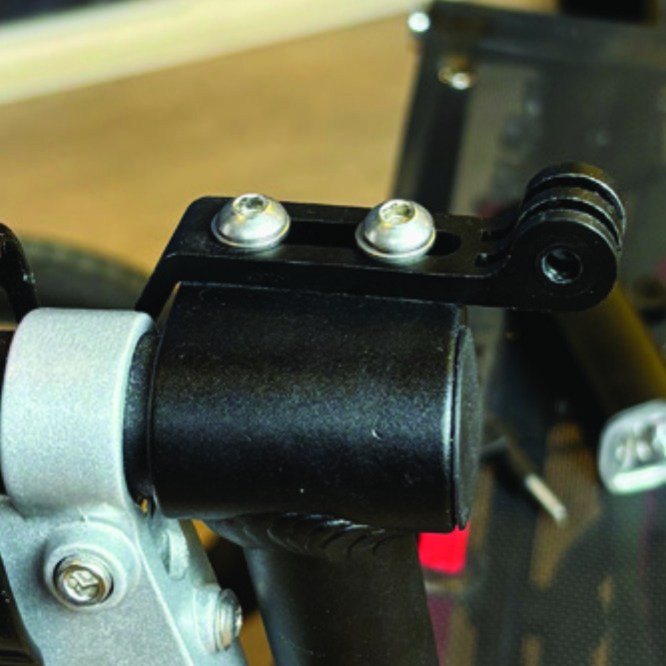
Identify the circular front end of the light holder, with two slots for attaching the light.
A6. Identify the circular front end of the light holder, with two slots for attaching the light.
Push the slotted bracket of the light into the slots of the holder and make sure they are aligned. Seen in the traveling direction of the Walker, enter the included wingnut from the left and tighten it.
A7. Push the slotted bracket of the light into the slots of the holder and make sure they are aligned. Seen in the traveling direction of the Walker, enter the included wingnut from the left and tighten it.

Instructions for a Veloped

Locate the screw at the center folding hinge of the U-shaped grip bar of the Veloped. Unscrew the screw with the included 4mm allen key and remove it.
B6. Locate the screw at the center folding hinge of the U-shaped grip bar of the Veloped. Unscrew the screw with the included 4mm allen key and remove it.
Identify the circular front end of the light holder, with two slots for attaching the light.
B7. Identify the circular front end of the light holder, with two slots for attaching the light.

Placing the Battery Pack

Instructions for a Walker
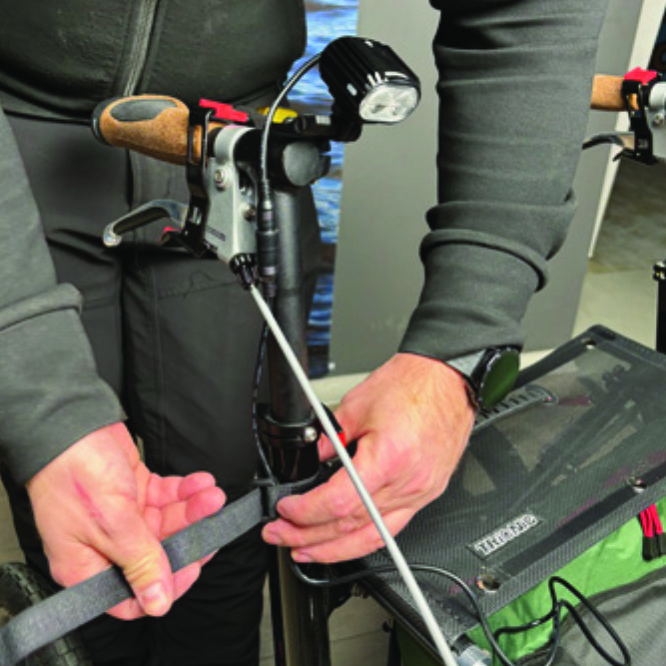
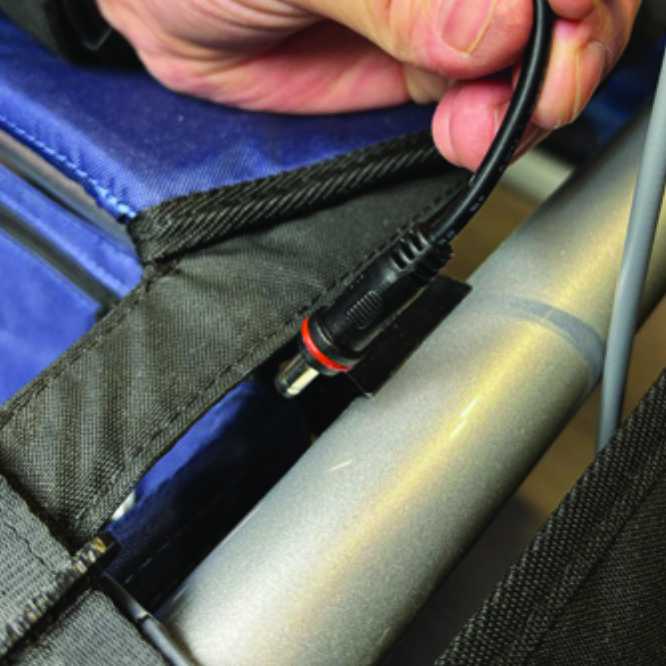
Run the longer extension cable along the semi-vertical grip tube of the Walker and secure it with the included velcro strap.
A8. Run the longer extension cable along the semi-vertical grip tube of the Walker and secure it with the included velcro strap.
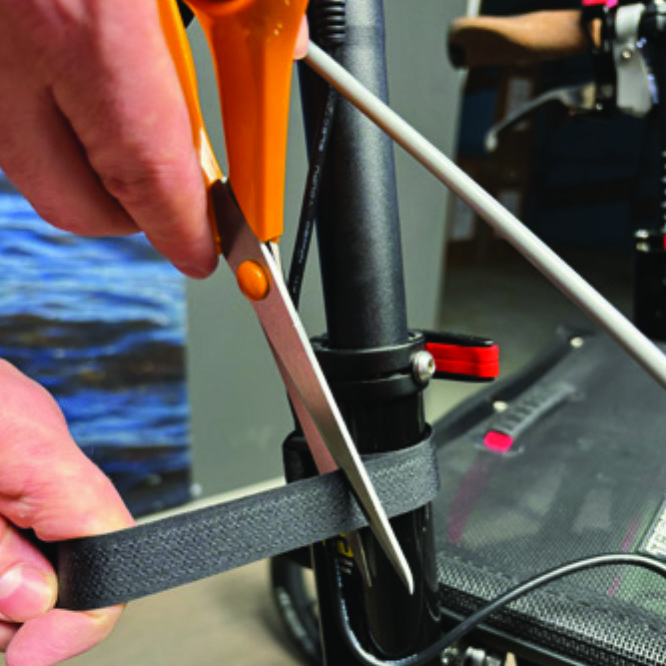
You can cut the excessive length of the velcro strap with a pair of scissors.
A9. You can cut the excessive length of the velcro strap with a pair of scissors.
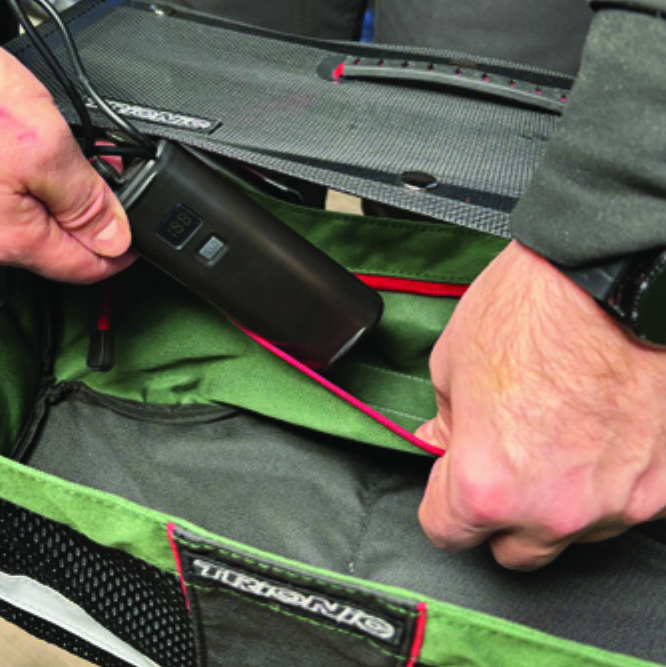
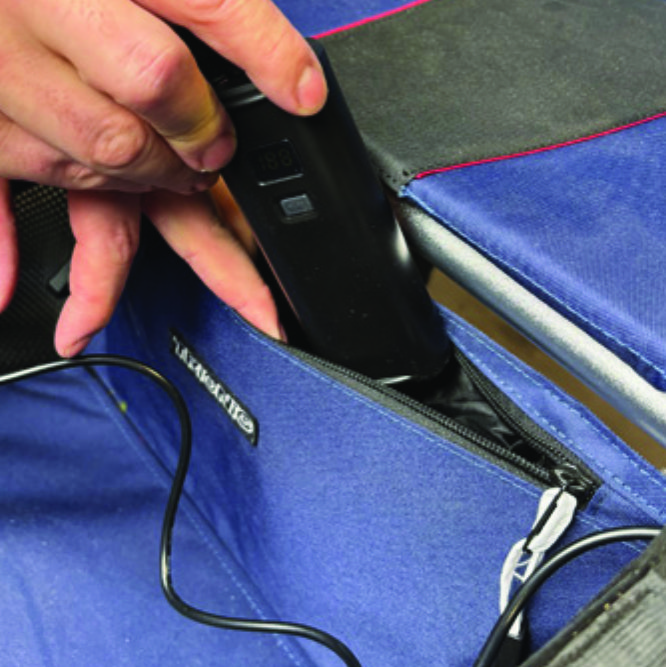
Place the battery pack in the rear zippered pocket of the basket.
A10. Place the battery pack in the rear zippered pocket of the basket.

Instructions for a Veloped

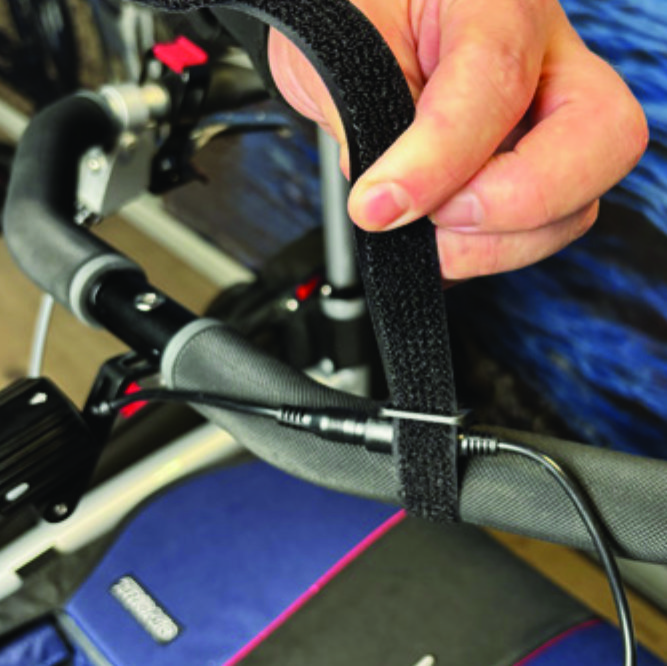
Run the longer extension cable along the U-shaped grip bar of the Veloped and secure it with the included velcro strap.
B8. Run the longer extension cable along the U-shaped grip bar of the Veloped and secure it with the included velcro strap.
You can cut the excessive length of the velcro strap with a pair of scissors.
B9. You can cut the excessive length of the velcro strap with a pair of scissors.
Place the battery pack in the rear zippered pocket of the basket.
B10. Place the battery pack in the rear zippered pocket of the basket.

The package contains

The package contains

How to operate the light

How to operate the light

Product Reviews    

  • Excellent…

    Excellent design, high quality components, build quality and packaging.
    My Veloped has given me confidence to expand my horizons.
    It has already proved to be an invaluable aid to carrying out garden tasks and also provides vital safeguard against l…

  • Walker 14, the more autonomy…

    My husband has serious balance problems due to a progressive neuropathy, walking with a cane is too hesitant to take walks, the Walker 14 from Trionic solved this problem because it also allows to take stony and grassy paths. Even if the price is hig…

  • Forest Walks Again!…

    Since getting my Veloped Trek 14er I've been able to get out about in the Forests again. Have even managed to get half way up the Black Mountains in Wales. Also able to get out and take photos again, something I love to do!…

  • Veloped Trek 14er M…

    This walker is a real help. Especially when both front wheels run together, I feel well guided while walking straight, and this is important because I am having balance problems and without it, I would easily stumble. Near where I live there are bump…

  • The Trionic walker gave me some of the freedom I had lost.…

    The Trionic Veloped Rollator changed my life. I thought I would never be able to take walks again, but the Trionic changed that. Not only can I go on long walks, but I am able to hike many of the mountain trails that I love. I'm not saying I can go r…

  • Veloped Sport 14er M…

    I do enjoy my Trionic Veloped. However, I think the seat depth could be improved by making the rear verticals slightly further back (which would probably involve major costs!). Also, I do not find the front wheel combination very helpful and have con…

  • Confidence…

    The Trionic 14er has enabled my wife to make great progress in her rehabilitation following a stroke. She has confidence in its stability and steering and this has given her the confidence to get out and walk. Worth the investment without reserve.…

  • Trionic Walker 14er…

    The Walker delivers what the advertising promises.…

  • Super Walker!…

    Dream device! I get everywhere with this Walker. Obstacles are no problem! It is not exactly inexpensive, but I would buy it again.…

Subscribe to our newsletter!