1600 Lumen Trionic LED Front Light with Battery Pack

This manual both shows how you attach the light holder and the light on a Walker (left column below) and also how you attach them on a Veloped (right column below).

In the left-hand photo, A shows the holder attachment parts for a Walker (2 screws + 2 washers). B shows the holder attachment parts for a Veloped (1 screw + 1 knurled nut + 1 nut).

1600 Lumen Trionic LED Front Light with Battery Pack

Attaching the Light Holder

Instructions for a Walker

On top of the black semi-vertical tube, locate the two screws that clamp the grip tube, situated in front of the brake lever.
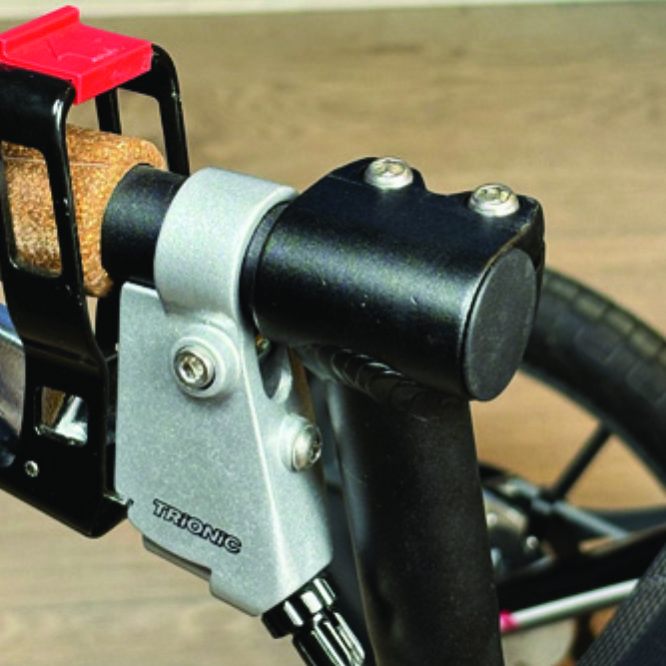
A1. On top of the black semi-vertical tube, locate the two screws that clamp the grip tube, situated in front of the brake lever.
Loosen both screws with the 5mm allen key included with the LED light.
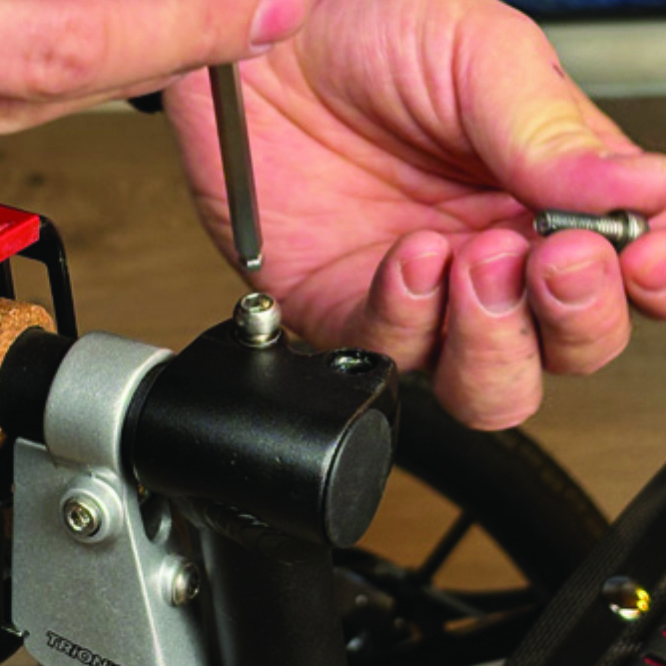
A2. Loosen both screws with the 5mm allen key included with the LED light.
Remove the two screws from the grip clamp.
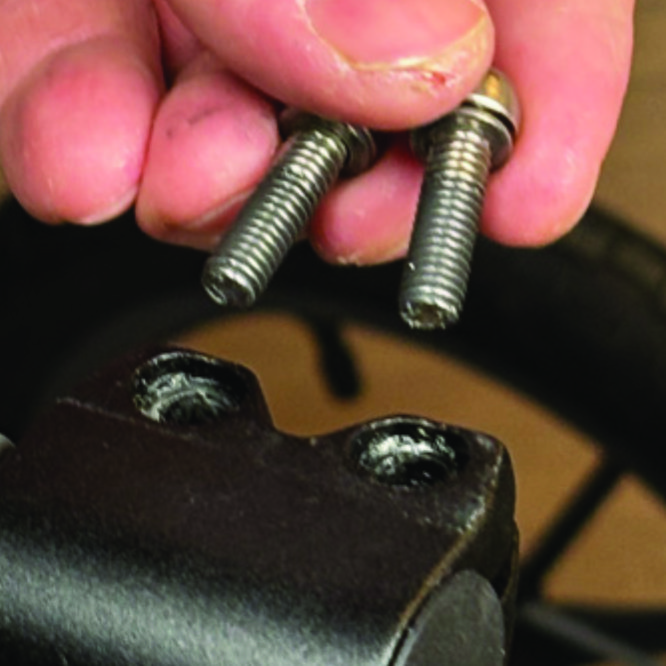
A3. Remove the two screws from the grip clamp.
Place the light holder on top of the grip clamp, with its circular and slotted light attachment pointing forwards and upwards. Enter the two screws with washers into the holes of the clamp.
A4. Place the light holder on top of the grip clamp, with its circular and slotted light attachment pointing forwards and upwards. Enter the two screws with washers into the holes of the clamp.
Tighten the two screws with the 5mm allen key. NOTE: It is important that you tighten the screws properly as they secure the grip tube with its rubber grip and brake lever.
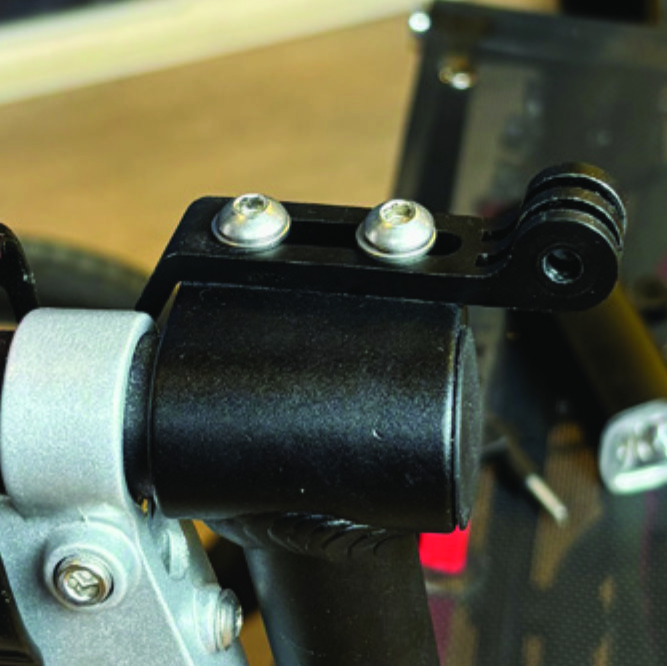
A5. Tighten the two screws with the 5mm allen key. NOTE: It is important that you tighten the screws properly as they secure the grip tube with its rubber grip and brake lever.

Instructions for a Veloped

Locate the screw at the center folding hinge of the U-shaped grip bar of the Veloped. Unscrew the screw with the included 4mm allen key and remove it.
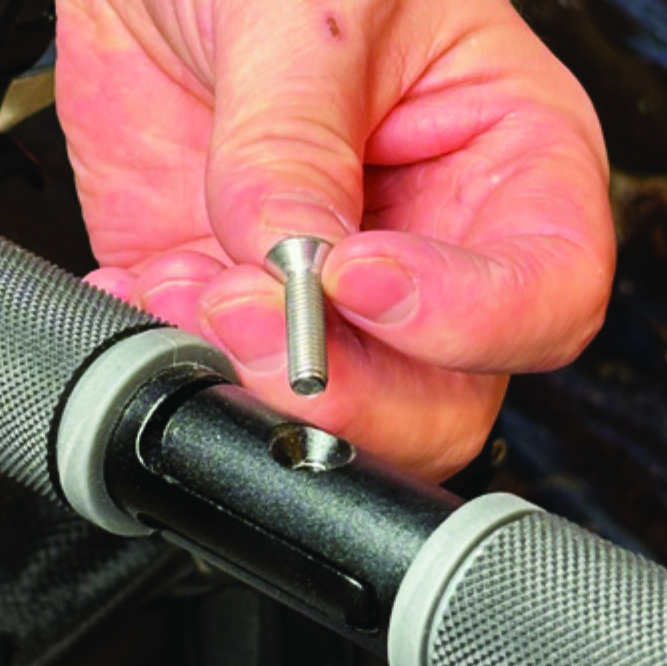
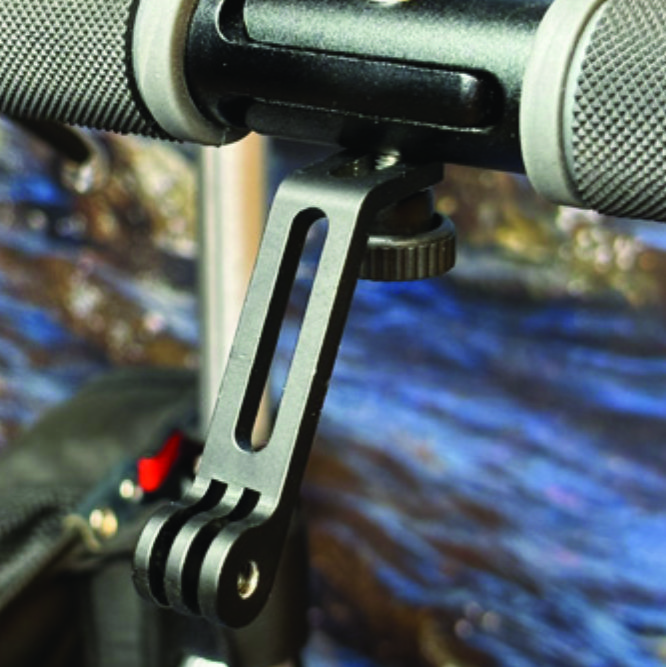
A1. Locate the screw at the center folding hinge of the U-shaped grip bar of the Veloped. Unscrew the screw with the included 4mm allen key and remove it.
Replace the old screw with the longer screw included with the LED light. Attach the longer screw to the hinge and tighten it with the 4mm allen key.
B2. Replace the old screw with the longer screw included with the LED light. Attach the longer screw to the hinge and tighten it with the 4mm allen key.
Attach the short angled end of the light holder to the lower end of the screw, on the downside of the grip bar. Fasten the holder with one washer and the knurled nut.
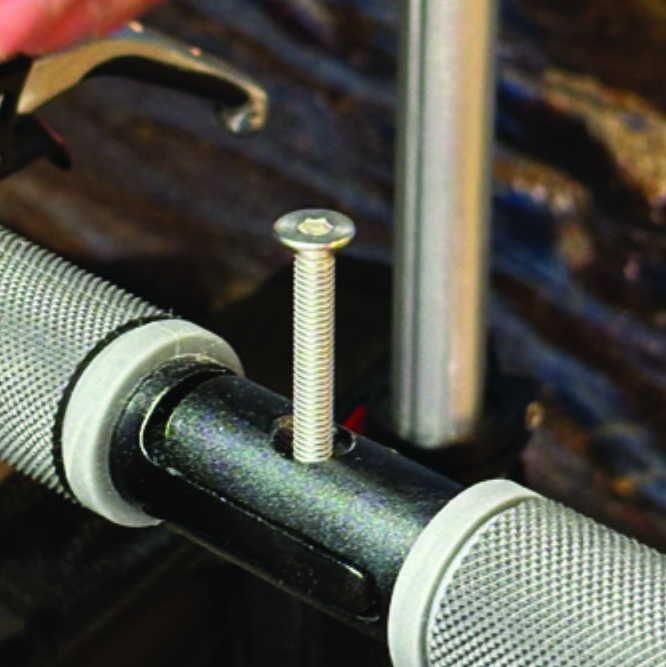
B3. Attach the short angled end of the light holder to the lower end of the screw, on the downside of the grip bar. Fasten the holder with one washer and the knurled nut.
For a more secure holder attachment, avoiding the holder to unintentionally turn sideways, replace the knurled nut with the included stainless steel nut and tighten it with a 10mm spanner.
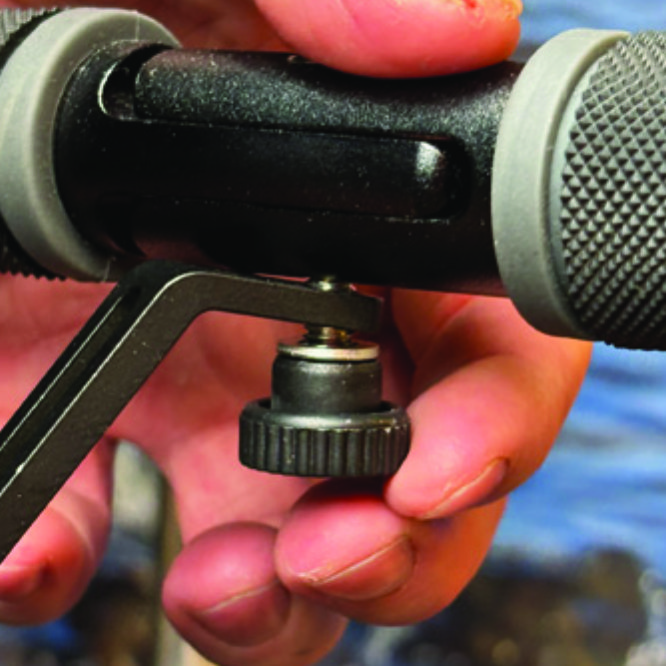
B4. For a more secure holder attachment, avoiding the holder to unintentionally turn sideways, replace the knurled nut with the included stainless steel nut and tighten it with a 10mm spanner.
This photo shows the light holder as correctly attached.
B5. This photo shows the light holder as correctly attached.

Attaching the LED Light to the Holder

Instructions for a Walker

Identify the circular front end of the light holder, with two slots for attaching the light.
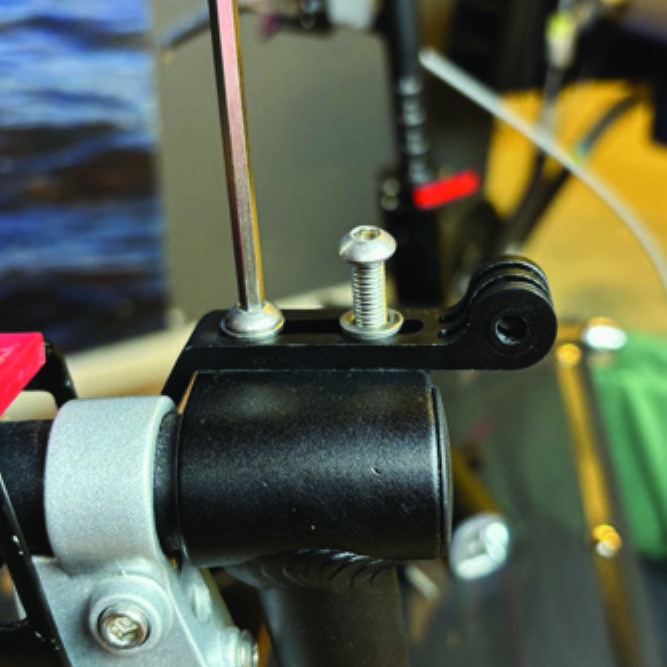
A6. Identify the circular front end of the light holder, with two slots for attaching the light.
Push the slotted bracket of the light into the slots of the holder and make sure they are aligned. Seen in the traveling direction of the Walker, enter the included wingnut from the left and tighten it.
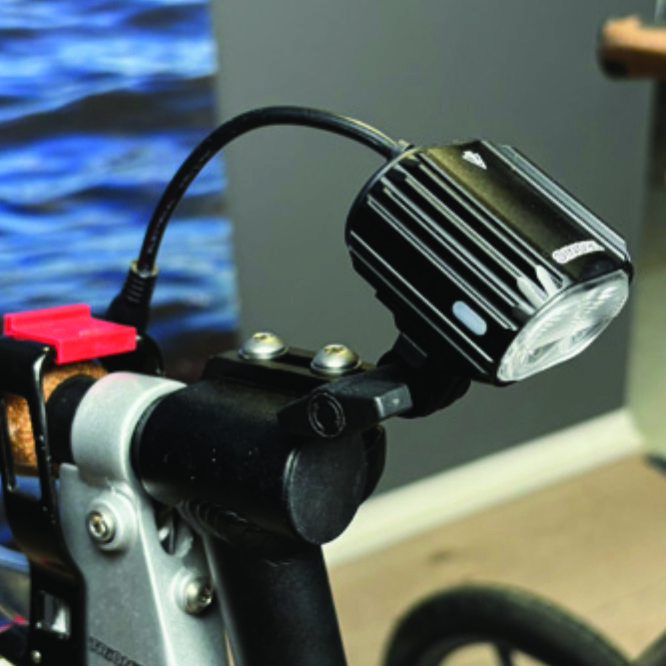
A7. Push the slotted bracket of the light into the slots of the holder and make sure they are aligned. Seen in the traveling direction of the Walker, enter the included wingnut from the left and tighten it.

Instructions for a Veloped

Locate the screw at the center folding hinge of the U-shaped grip bar of the Veloped. Unscrew the screw with the included 4mm allen key and remove it.
B6. Locate the screw at the center folding hinge of the U-shaped grip bar of the Veloped. Unscrew the screw with the included 4mm allen key and remove it.
Identify the circular front end of the light holder, with two slots for attaching the light.
B7. Identify the circular front end of the light holder, with two slots for attaching the light.

Placing the Battery Pack

Instructions for a Walker

Run the longer extension cable along the semi-vertical grip tube of the Walker and secure it with the included velcro strap.
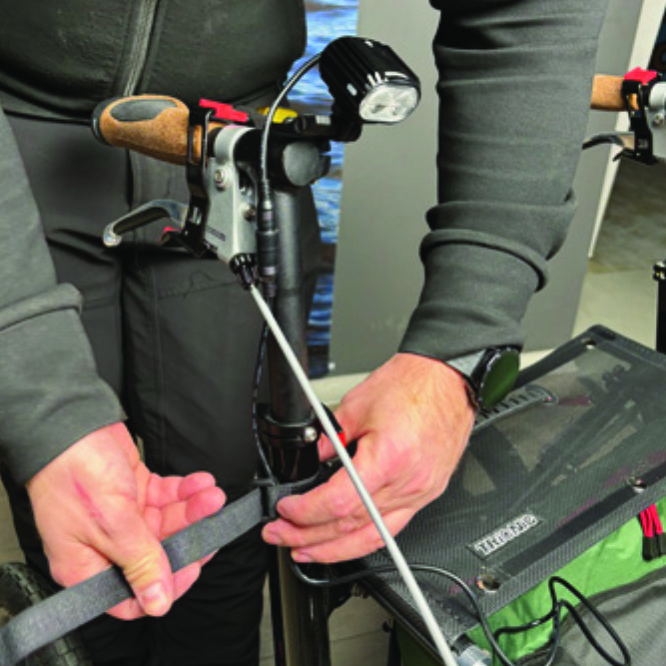
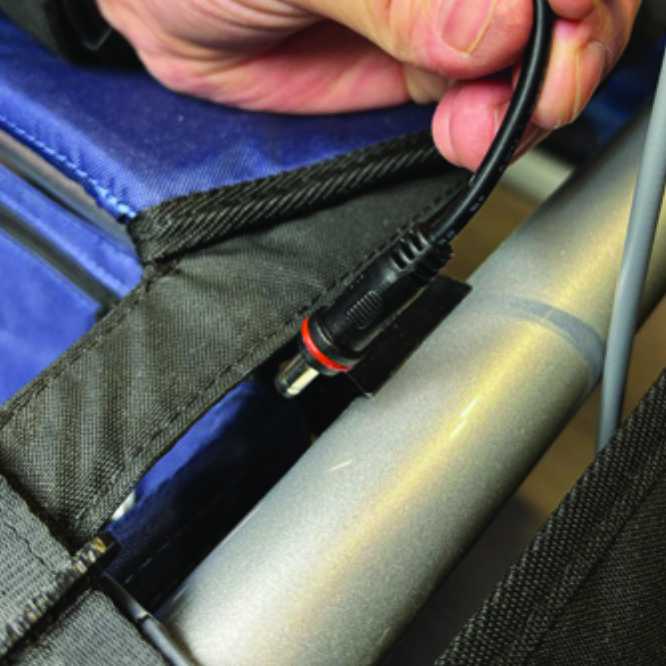
A8. Run the longer extension cable along the semi-vertical grip tube of the Walker and secure it with the included velcro strap.
You can cut the excessive length of the velcro strap with a pair of scissors.
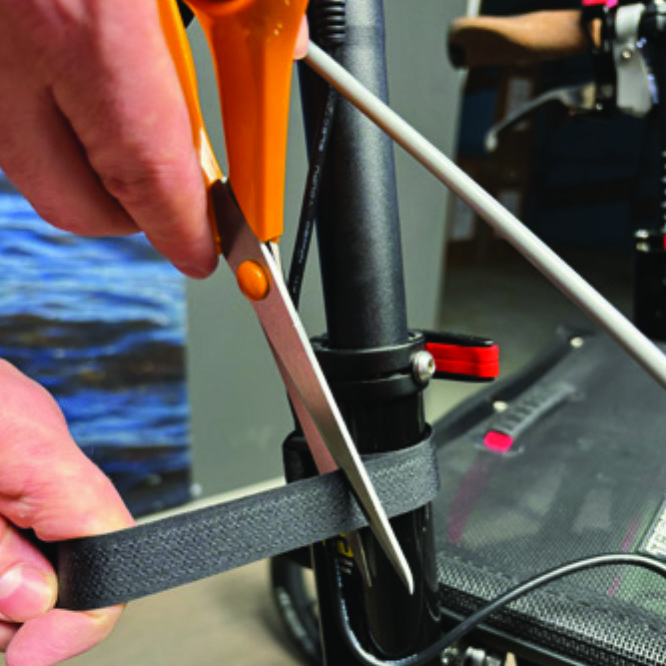
A9. You can cut the excessive length of the velcro strap with a pair of scissors.
Place the battery pack in the rear zippered pocket of the basket.
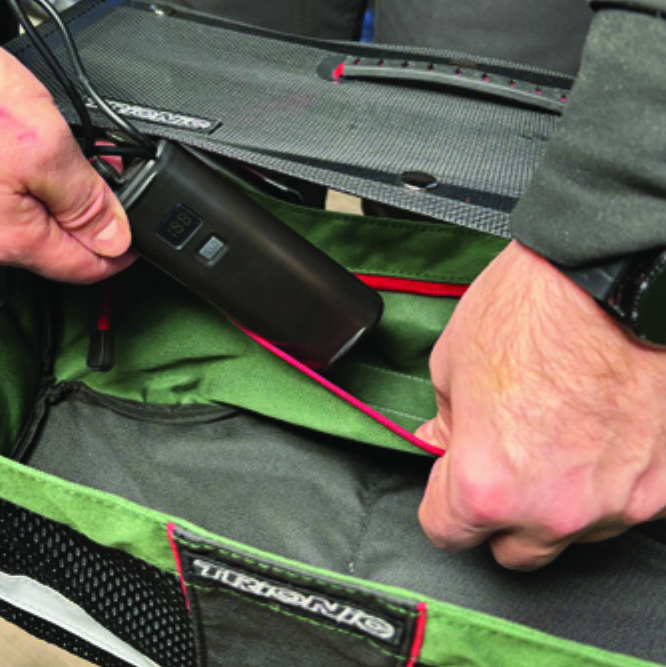
A10. Place the battery pack in the rear zippered pocket of the basket.

Instructions for a Veloped

Run the longer extension cable along the U-shaped grip bar of the Veloped and secure it with the included velcro strap.
B8. Run the longer extension cable along the U-shaped grip bar of the Veloped and secure it with the included velcro strap.
You can cut the excessive length of the velcro strap with a pair of scissors.
B9. You can cut the excessive length of the velcro strap with a pair of scissors.
Place the battery pack in the rear zippered pocket of the basket.
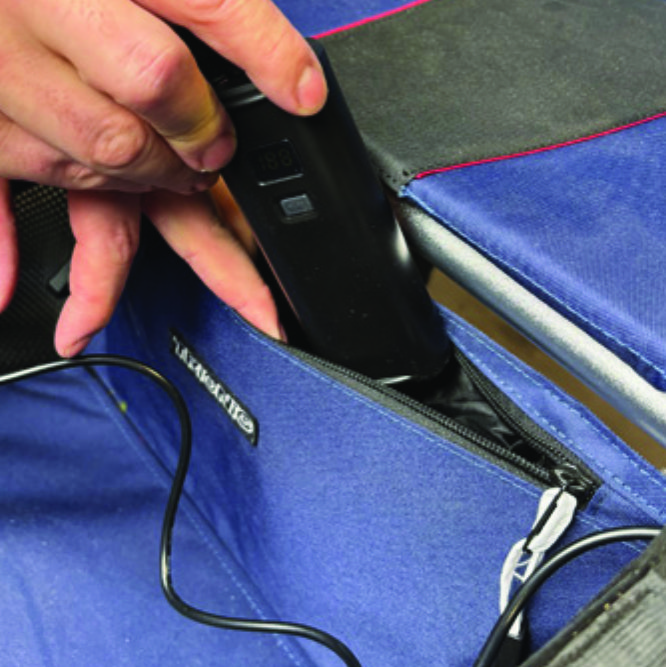
B10. Place the battery pack in the rear zippered pocket of the basket.

The package contains

The package contains

How to operate the light

How to operate the light

Product Reviews    

  • Trionic Veloped Sport…

    I have a rare neurological condition Hereditary Spastic Paresis which causes muscle stiffness, balance issues, and consequently mobility problems. I have used walking poles for the last couple of years but when I walk I no longer enjoy my surrounding…

  • I would always choose it again...…

    Dear Ladies and Gentlemen, I was made aware of your product (Veloped) by a friend.

    I am 75 years old. I have Parkinson's disease and have been dependent on a rollator for several years… These rollators did not last long, so I was always looking fo…

  • My Veloped has changed my life…

    Since the operation to remove a tumour from my spinal cord, I can only walk with two crutches and this is a slow and painful process. I was finally told about rollators but thought they looked feeble and unattractive. My wish was to walk on the beach…

  • Changed My Life…

    I have a balance disorder. The Rollator Walker is great for so many reasons. It is very sturdy, engineered to turn easily. Gives me independence that I had lost. I bought an extra one so that I have one in the car and one for the yard.…

  • All round brilliant machine and super efficient people to advise.…

    The Trionic 14er has made such a difference to my life. I pulled it out of the box and set off for a walk: down the slab path, and shallow steps, over the rough gravel drive, along the road and back to my door. The Trionic 14er is effortless to move.…

  • No problems at the beach…

    I have always been fit and healthy until 2 years ago. An accident at work put an end to that. I now have an inexplicable pain in my leg and back that makes walking almost impossible. After using some granny walkers, Trionic came up via Google. I had …

  • My life has changed.…

    I cannot thank you all enough for my new Veloped Tour. It has opened up many things which I have been unable to do for the past 2 years. The main thing being country walks & trails, walking more than 3-4 kilometres which may not seem a lot but not b…

  • I am absolutely thrilled with my Walker 12er.…

    I am absolutely thrilled with my Walker 12er. A fantastic finish, a modern design. It has attracted a lot of attention both in public places and on the Underground, attracting praise and appreciation for both its appearance and workmanship, thus conf…

  • Very good quality…

    Expensive but worth the quality of life it brings. As opposed to an ordinary walker. The first day I walked 5 miles around an indoor shopping mall. I was tired at the end of it. But something I could never have done before. I have used it on rough gr…

Subscribe to our newsletter!

"> ?>